Today, tattoos are a popular form of self-expression, with people of all ages and backgrounds getting inked. The tattooing process involves several steps, from choosing a design to applying the finishing touches. It’s important to choose a reputable tattoo artist and follow their instructions for caring for the tattoo after the process is complete. With proper care, a tattoo can last a lifetime and serve as a meaningful form of self-expression.
But how exactly does the tattooing process work? In this blog post, we’ll take a closer look at the tattooing process, from start to finish.
 Choosing a design
Choosing a design for a tattoo can be a daunting task, as a tattoo is a permanent mark on the body that will be with you for life. It’s important to take the time to choose a design that you will be happy with for years to come. In this essay, we will explore the factors to consider when choosing a design for tattooing.
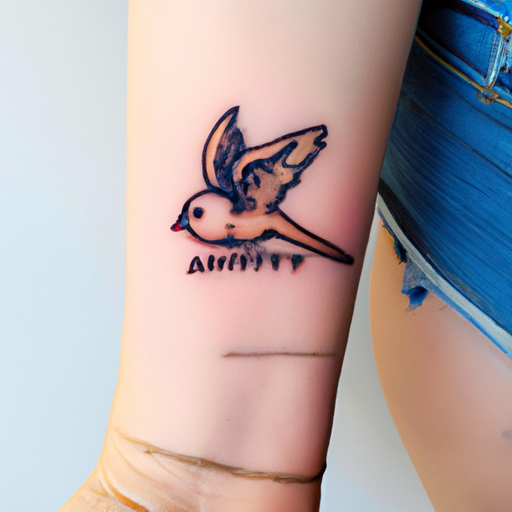
The first thing to consider when choosing a design for a tattoo is its significance. A tattoo can serve as a meaningful form of self-expression, and many people choose designs that hold personal significance. Some people choose to get the names of loved ones tattooed on their bodies, while others opt for symbols or images that represent their interests, beliefs, or cultural heritage. When choosing a design, consider what is meaningful to you and what you want your tattoo to represent.
Another important factor to consider is the style of the tattoo. There are many different styles of tattooing, from traditional to modern, and each style has its own unique characteristics. Some people prefer bold, black-and-white designs, while others prefer colorful, intricate designs. When choosing a design, consider what style you prefer and what will best suit your personality and lifestyle.
The size and placement of the tattoo are also important factors to consider. Larger designs are more difficult to remove or cover up, so it’s important to choose a size that you will be comfortable with for the rest of your life. Similarly, the placement of the tattoo can have a significant impact on its visibility and how it will be perceived by others. Consider whether you want your tattoo to be visible all the time or if you prefer to be able to cover it up.
When choosing a design for a tattoo, it’s also important to consider the technical aspects of tattooing. Not all designs are suitable for tattooing, as some may be too complex or intricate to transfer onto the skin. It’s important to work with a reputable tattoo artist who can advise you on the technical aspects of the design you have chosen and whether it can be successfully executed as a tattoo.
 Preparing the skin
Preparing the skin for tattooing is an important step in the tattooing process, as it helps to ensure that the tattoo is applied properly and reduces the risk of infection. In this essay, we will explore the steps involved in preparing the skin for tattooing.
The first step in preparing the skin for tattooing is to clean the area thoroughly. The tattoo artist will typically use an antiseptic solution to clean the area, removing any dirt or debris that may be present on the skin. This is important because it helps to ensure that the area is free of bacteria and other contaminants that could cause an infection.
Once the area has been cleaned, the artist will typically shave the area where the tattoo will be applied. This is done to remove any hair that may interfere with the application of the tattoo. It also helps to ensure that the area is clean and free of any debris that could interfere with the tattooing process.
After the area has been cleaned and shaved, the artist may apply a stencil to the skin. The stencil is a guide that the artist will use to apply the tattoo. It is typically made by creating a design on a special paper and then transferring the design onto the skin using a transfer solution. This helps to ensure that the design is applied accurately and that the tattoo is positioned correctly on the skin.
Finally, the artist may apply a topical anesthetic cream to the area to help manage pain during the tattooing process. This is a common practice, as tattoos can be quite painful, especially for those who are getting their first tattoo. The cream is applied to the skin and left on for a period of time before the tattoo is applied. This helps to reduce pain and discomfort during the tattooing process.
 Applying the stencil:
Applying a stencil for tattooing is a crucial step in the process of creating a tattoo. A stencil acts as a guide for the tattoo artist, allowing them to create an accurate and precise design on the skin. In this essay, we will explore the steps involved in applying a stencil for tattooing.
The first step in applying a stencil is to choose the design for the tattoo. This can be a pre-made design, a custom design created by the artist or the client, or a combination of both. Once the design has been chosen, it is important to ensure that it is the right size and shape for the area of the body where the tattoo will be placed.
Next, the tattoo artist will create the stencil. This is typically done by printing or drawing the design onto a special type of paper that can be transferred to the skin. The paper is then placed on a thermal copier machine, which uses heat to transfer the image onto another piece of paper coated with a special transfer solution.
Once the stencil has been created, it is placed on the skin, making sure that it is positioned correctly and that it conforms to the contours of the body. The stencil is held in place with a special adhesive or by applying a light layer of petroleum jelly.
After the stencil has been applied, the artist will use a special transfer solution to transfer the design onto the skin. The solution is applied to the back of the stencil, and the stencil is then gently pressed onto the skin. The solution helps to transfer the design from the stencil onto the skin, creating an outline that the artist can follow when applying the tattoo.
Once the stencil has been applied and the design has been transferred to the skin, the tattoo artist will carefully remove the stencil. They will then use the outline created by the stencil as a guide to apply the tattoo, using a tattoo machine and a series of needles to inject ink into the skin.
 Outlining the design:
The first step in outlining the design is to choose the appropriate needle for the tattoo machine. Tattoo needles come in different sizes and configurations, and the choice of needle will depend on the size and complexity of the design, as well as the client’s skin type and personal preference. Once the appropriate needle has been chosen, the artist will attach it to the tattoo machine and adjust the settings to ensure that it is working correctly.
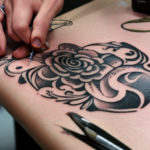
Next, the artist will dip the needle into ink and begin outlining the design. The needle is held like a pen, and the artist will use a series of precise movements to create a clear, crisp outline of the design. It is important to note that outlining is not a continuous process – the artist will work on small sections of the design at a time, taking breaks to rest their hand and re-dip the needle in ink as needed.
As the artist works, they will monitor the depth of the needle and adjust the pressure accordingly. The needle should not penetrate the skin too deeply, as this can cause scarring or other damage. At the same time, it should not be too shallow, as this can result in a faded or blurry outline.
Once the outline is complete, the artist will wipe away any excess ink and blood from the skin. They will then take a step back and examine the design, making any necessary adjustments or touch-ups as needed. This may involve going over certain sections of the outline again, or adding additional details to the design.
 Filling in the design:
Filling in the design for tattooing is the next step in the process of creating a tattoo after the outline has been completed. This step involves using a tattoo machine and various shades of ink to fill in the design, creating a permanent work of art on the skin. In this essay, we will explore the steps involved in filling in the design for tattooing.
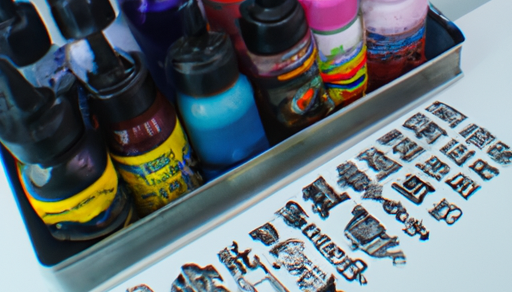
The first step in filling in the design is to choose the appropriate shades of ink. This will depend on the design, as well as the client’s skin tone and personal preference. The artist will use a variety of needles and shading techniques to create depth and dimension in the tattoo, using lighter and darker shades of ink to create contrast and texture.
Once the artist has selected the appropriate shades of ink, they will begin to fill in the design. This is typically done by using a series of precise, controlled movements to inject ink into the skin. It is important to note that the tattoo machine should never be held at a 90-degree angle to the skin, as this can cause the ink to be forced too deeply into the skin, resulting in scarring or other damage.
As the artist works, they will periodically wipe away any excess ink and blood from the skin. They will also take breaks as needed to rest their hand and re-dip the needle in ink. It is important for the artist to work slowly and carefully, ensuring that the ink is evenly distributed and that the design is filling in correctly.
Once the design has been filled in, the artist will take a step back and examine the tattoo, making any necessary adjustments or touch-ups as needed. This may involve going over certain sections of the tattoo again, or adding additional details or shading to the design.
 Applying the finishing touches:
Applying the finishing touches for tattooing is the final step in the process of creating a tattoo. This step involves adding the final details and adjustments to the tattoo, ensuring that it is perfectly finished and ready for the client to wear. In this essay, we will explore the steps involved in applying the finishing touches for tattooing.
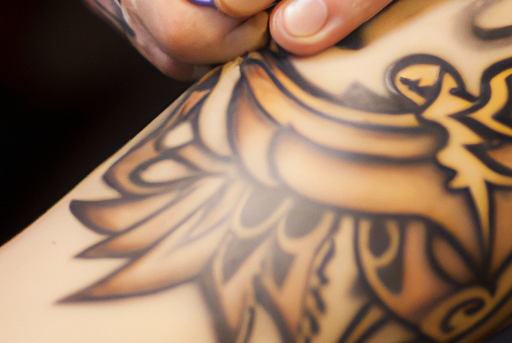
The first step in applying the finishing touches is to carefully inspect the tattoo for any imperfections or inconsistencies. This may involve checking the shading, ensuring that lines are crisp and clean, and making sure that the design is symmetrical and balanced.
Next, the artist will use a variety of tools to add any final details or adjustments to the tattoo. This may involve using a liner needle to add small details or to touch up any areas that need it. The artist may also use a white ink to highlight certain areas of the tattoo, creating a sense of depth and contrast.
Once any necessary adjustments have been made, the artist will wipe away any excess ink and blood from the skin. They may also apply a thin layer of ointment or petroleum jelly to the tattoo to help it heal and protect it from the elements.
Finally, the artist will provide the client with aftercare instructions, explaining how to properly care for their new tattoo in the days and weeks following the procedure. This may involve avoiding exposure to the sun, refraining from scratching or picking at the tattoo, and keeping it clean and moisturized.
The post written above cover various aspects of the tattooing process, from choosing a design and preparing the skin to applying the finishing touches. They provide detailed information on each step involved in creating a tattoo, including applying the stencil, outlining and filling in the design, and adding the final details. The post emphasize the importance of proper technique, attention to detail, and aftercare in ensuring that the tattoo is beautiful, lasting, and safe for the client.